SCISSORS – PAPER – ROCK: MAKING COMBAT DECISIONS AND APPLYING THEM TO SMALL UNIT TACTICS

This class is a work in progress.  My idea is that we freeze due to indecision, there are too many options to choose from, or we don’t have experience to draw on.  If the thought process can be broken down into simpler chunks, those decisions are easier and faster.

HOW DO WE MAKE DECISIONS?

Essentially, we observe what is around us, we understand and make a decision based on that information, we act on that decision, that action changes our situation, which we then observe.  Repeat.  In graphic form, it looks like this:

We freeze when there is a bottle-neck between Perception and Comprehension, so let’s break that part down a little further.  Sometimes when we see something we think “hey, I’ve seen that before, I know what to do”, that is Intuition.  In Intuition, your Perception accesses your long term memory, gets a response, and goes directly to Action.  If your long term memory says “hunh, well that’s weird” you now have to consciously think about what to do next.  This decision making process takes time;  it looks for similar experiences in long-term memory, it accesses short-term memory (“didn’t I read a blog article about this?”), and applies reason to make a decision.  Graphically, it looks something like this:

What else can affect our decision making?

We see and hear everything around us, but our brain filters out what it considers to be not important.  Those filters access our long term memory for that information.  Our filters are also impacted by any goals we may have, which can be good (“stay on target!”), or bad (target fixation, “I’m gonna get that *#@#!!!”).  And finally, of course, stress impacts all of this (“Gah, I don’t have time for this!”).  Adding all of that into our chart, we end up with this:

So, what do we need to develop our situational awareness?

Essentially, we need to train our filters so that only the important information gets through.  And, we need to train our long-term memory so that we know what action to take on the information available.  Now here’s the fun bit, it’s really hard to do this on your own.  Why?  Because if you filter out certain information, you won’t know you missed it until somebody else tells you.  Basically, you don’t know what you don’t know.

People with poor situational awareness are unaware of their poor decisions.  Mentoring is key here, so find somebody who knows what they are doing and get their feedback.

In the meantime, you can work on developing your decision-making, and that is what I want to talk to you about in this class. I could tell you things like “in this situation, do this”, but that only goes into short-term memory, and won’t be applicable to all variations of that situation.  Instead, I’d like to give a framework on HOW to make that decision.

Scissors, Paper, Rock!

Fundamentally, all combat comes down to three basic factors; defence, range, and mobility. This mirrors the game of Scissors, Paper, Rock.

ROCK: static defence, the ability to stop incoming attacks

PAPER: static range advantage, the ability to hit without being hit back

SCISSORS: mobility, the ability to change range.

Individuals and weapons forms will fit into this framework.  I am short, with short arms, and my favourite form is sword and shield.  By nature, I am largely, but not entirely, Rock.  If my opponent has a long weapon, or is much taller than me, I am facing Paper (Rock’s evil Nemesis!).  If I just stand there and block shots, I will eventually lose; Paper beats Rock.  If I want to win, I have to close to negate the range advantage.  That is, I must tap into my inner Scissors to equal the range.  With no range advantage, Paper becomes Rock and the contest becomes Rock vs Rock.  May the best Rock win!

EXERCISE: Self-assessment of your own strengths and weaknesses into percentages of Scissors, Paper, and Rock.

This principle can be scaled up to larger units.  A shieldwall has lots of defence, but limited range.  A small fast unit has mobility but limited range or defence depending on its makeup.  A spear unit has lots of range but limited defence.  Each of these unit types has advantages and disadvantages that make them very good for particular jobs, and very vulnerable in other situations.

Let’s talk for a moment about what a “small unit” is:

Personally, I consider any melee team of 10 or less to be a “small” unit.  I’ll explain why in a moment.  But first, some more human psychology…

How many people can one person personally direct, while still fighting themselves?  About 5, including the commander.  This goes back to our lovely “situational awareness” chart.  If the commander is both fighting and commanding, there is a high informational load.  It is difficult for one person to process that much information while still being an effective combatant.  In a 10-man team, you can’t afford to have one person not contributing to the group effort since that is 10% of your team.  There is also the basic physical difficulty in calling orders over the din of battle, your voice only carries so far.

So, how do we get 10 if you can only directly control 5?  Sub-commanders, with 2-3 man units, with specific directions in the tactical plan.  By designating sub-commanders, you can extend your tactical control over a longer line, with greater flexibility.  Oh, and as a new commander, this is a great position to start in (hint, hint).  These sub-units, often called Triads, are a great building block.  Smaller Cantons can train together, 3-on-3, in these groups.  Two triads, blown apart on the field, can form into a single 5-man unit, and continue on.

As a commander, you need to assess your team members’ strengths and weaknesses in order to make your main and sub-units.  Typically, you’ll want your Rocks and Paper in the centre, with your mobile Scissors on the flanks ready to react to what-ever your opponent throws at you.  How you set up your team, and what battle tactic you decide on, will be determined by what you have available.

How does Scissors Paper Rock work in melee?

Ideally, I want to be able to kill you before you can kill me, so it’s all about range, and controlling that range.  A shield wall on its own has a short effective range, maybe about 4’.  Placing spears behind the wall extends that range to about 6’.  Placing spears in front of the wall extends the effective range to about 12’, since those spears have greater mobility.  If a line of spears is chewing up my line (Paper beats Rock), I need to drive them back (Scissors beats Paper) by advancing my wall, by sending a sub-unit behind their line, or by sending in a column charge to create a local breakthrough.

Let’s take a look at how that works out in a standard shieldwall:

EXERCISE:
1. You will be provided with a bag of 15 tokens marked
with a variety of weapons forms; Shield, Pole Arm,
Spear, and Two Weapon. Chose 10 at random, and set
up your starting line-up and initial attack plan.
2. Teams will be paired off against each other, and the
group will discuss the advantages and disadvantages of
each set-up and plan.

A note on Gods and Heroes:
Another reason why I consider 10-man to be the divider for “small” units is the presence of a Fighting God on the other team.  If the other team has a seriously kick-ass Super Duke of Infinite Destruction, that needs to be taken into consideration in the tactical plan since that person’s skill level is sufficiently high that ignoring it can be the deciding factor in the engagement.  This is where your sub-commanders come in, designate one as the God-Killer, or at least Keep-Him-Busy until we can win the rest of the battle.  If your team has the God, designate a sub-unit to take out the opposing sub-unit that will try to take out your God.

While I’m on the topic, I should mention Heroes.  Heroes are not team players. They are interested in personal glory, fighting rather than winning, and are quite willing to run away to find that glory.  A hero in the shieldwall will run off, leaving a hole that can be blown wide open.  Never put a hero in the middle of a shieldwall.  Heroes are great when you have a God to take care of.  Give your heroes a task that works with their strengths.

Back to small units….

Where do we use small units?  Ten-man melees for starters.  They are useful in timed resurrection battles, where that may be your reinforcement size.  Large battles with local terrain like Town, Woods, or Broken Field can use small units for specific tasks like guarding a gateway, banner guards, shock units for taking ground or specific objectives etc.  Households, Baronies, and large Cantons can all field small units which work together within the Army.  Most melees in Ealdormere will end up as small units due to our smaller size.

Pennsic, Pennsic, Pennsic…

The battles at Pennsic can be broken down into three basic categories: Open Manoeuver, Limited Manoeuver, and Restricted Front.

Open Manoeuver:  Field Battle

Manoeuver for effect.
Open flanks are choice target.
Small mobile units to protect the flanks, pin lines.
Break through and reforming.

Limited Manoeuver:  Broken Field, Town, Mountain Pass, Woods

Local tactical situation, especially in the woods with limited visibility.
Specific objectives.
Often a resurrection battle, so reinforcements need to be managed for maximum effectiveness.
Obstacles allow local numerical superiority, kill pockets, don’t get drawn out into the open field if you are out numbered.

Restricted Front:  Bridge

Spear duels.
Open order with shields.
Pulse charges, both giving and receiving.
Control of reserves to prevent over-crowding.

EXERCISE:  Use the melee tokens to demonstrate the above tactical situations.

On hardening leather armour #3, rerebrace with hide glue

note, this is my documentation from 2015.  Over the years, these have held up quite well although they have softened somewhat.  Overall I would consider this experiment to be a success, but not the final solution.


A 14th Century Leather Rerebrace

 Kingdom Arts and Sciences 2015

BM rerebrace

Project Description:

To create a pair of hardened leather rerebraces, suitable for SCA combat, based on an extant piece in the British Museum (item 1865,0701.1665).  The piece will need to be able to withstand blunt impact, wet conditions, and general wear and tear.

Extant Piece:

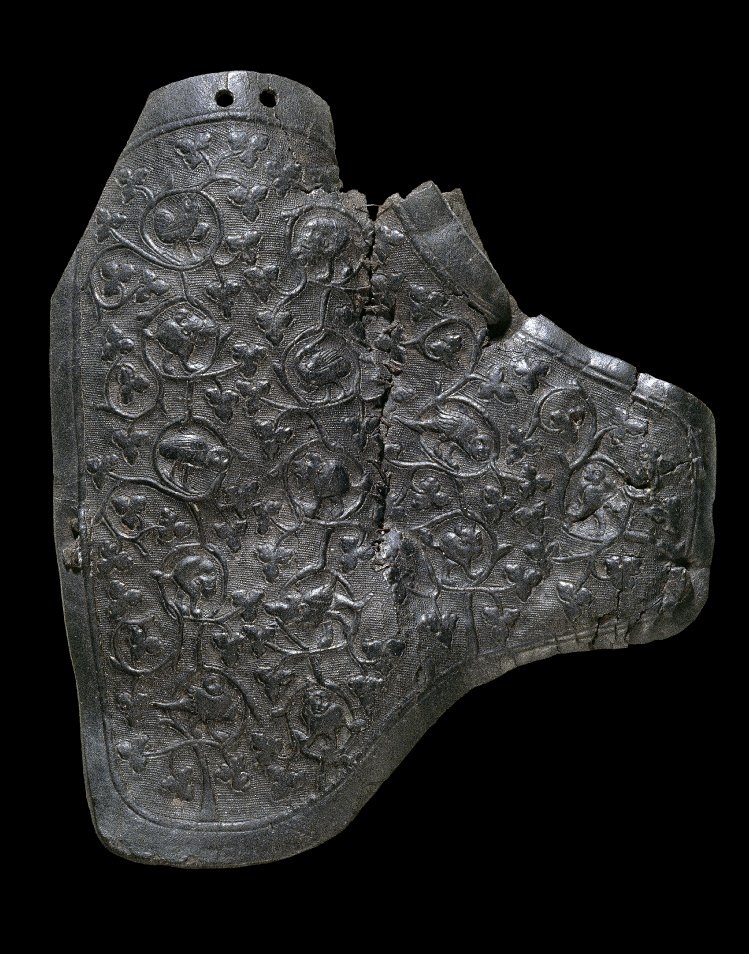
The rerebrace in the British Museum (see cover page) is made of leather, tooled with scrollwork inhabited with grotesques.  The grounding consists of fine lines of dots, approximately 36 to the inch, while the outlines are made with a blunt liner.  The entire piece measures 287mm (11.3″) in length, which based on anthropomorphic data would indicate that it was made for a man at least 6′ tall.  The piece is lined with a second lighter piece of leather, possibly as padding, or perhaps as reinforcing for the extant tear.  The remains of three straps run through slits in the leather, one on the long outer edge and two on the inner edge.  The object description does not provide the thickness of the leather.

Museum number 1856,0701.1665

Description Upper cannon of a right vambrace (rerebrace) of moulded leather. Originally tubular, it has been flattened into its current rounded T­shape. It has a pair of holes at the top for points, a slot with the remains of a leather strap at the centre of the outside edge, and slots for two more at the centre of the inside edge, one containing a strap fragment, where it was originally strapped round the arm. Inside is a separate leather lining, of softer leather, with a repaired cut. The exterior is tooled, stamped, incised and modelled with diaper design of foliage inhabited by birds and mythical two­legged beasts, and a plain border. The upper rear border has been cut off.

Date 14thC

Dimensions:  Length: 287 millimetres, Width: 245 millimetres

Past Research:

I have been working towards this project for several years. In my first attempt, I did not account for the scale of the piece, nor was I aware of the method used for the groundwork.  I scaled down the entire piece to fit my arm and used modern grounding tools. Since I’m much shorter than the original owner, the details were too small to fit properly on the piece.  I completed the tooling as practice, but decided to discard it. As the piece was a “throw-away” anyway, I tried hot-water hardening of the tooled leather.  As expected, the tooling was almost completely destroyed when the water was absorbed.

I then began some research into alternate methods of hardening in place of the SCA-traditional wax.  Cennini describes how to make helm crests and parade helmets by first making a tawed leather core (similar to the method for water bottles) then hardening it with several coats of goat-skin glue.  He also refers to goat skin glue being used by saddlers, but does not specify in what manner.  In his description of the manufacture of this glue, he calls for the “necks” of goat or sheep parchment to be boiled in water, presumably he is referring to the waste pieces of the hide. Hide, fish (which Cennini calls leaf glue), and cheese (casein) glues were widely used in period.  Unfortunately, they are also water-soluble, a characteristic unsuitable for armour.  I decided to experiment with hide glue as it is readily available in granular form and thus easy to adjust the proportions.

A search of various internet sources provided a number of suggestions for rendering hide glue waterproof;  adding tannic acid, alum, or skim milk, or exposure to wood smoke (formaldehyde).  I then conducted a series of experiments (see notebook) to test some of these methods, as well as different consistencies of the glue to get good penetration into the leather.  By the end, I had decided on alum in distilled water as my preferred method. I made two pieces of armour, vambraces and spaulders, using a post-treatment of the glue-soaked leather with alum.  I then wore them for a year under all conditions.  Both performed well, although the vambraces became a little sticky at Pennsic under humid/sweaty conditions.  Both pieces used a fairly thick glue solution, 10:1, which did not penetrate well into the leather.  I then wiped down the surface with a saturated alum solution to remove excess glue and to post-treat the glue.  For this project I used a thinner glue solution for better penetration, and pre-treated the leather with alum solution.

I like the dark tone of the extant piece, although that may be age and/or  conservation processes.  At last year’s KA&S I entered a leather scabbard dyed with walnut dye.  I decided to use the same dye to both darken the rerebraces and highlight the tooling.

Project Process – Tools:

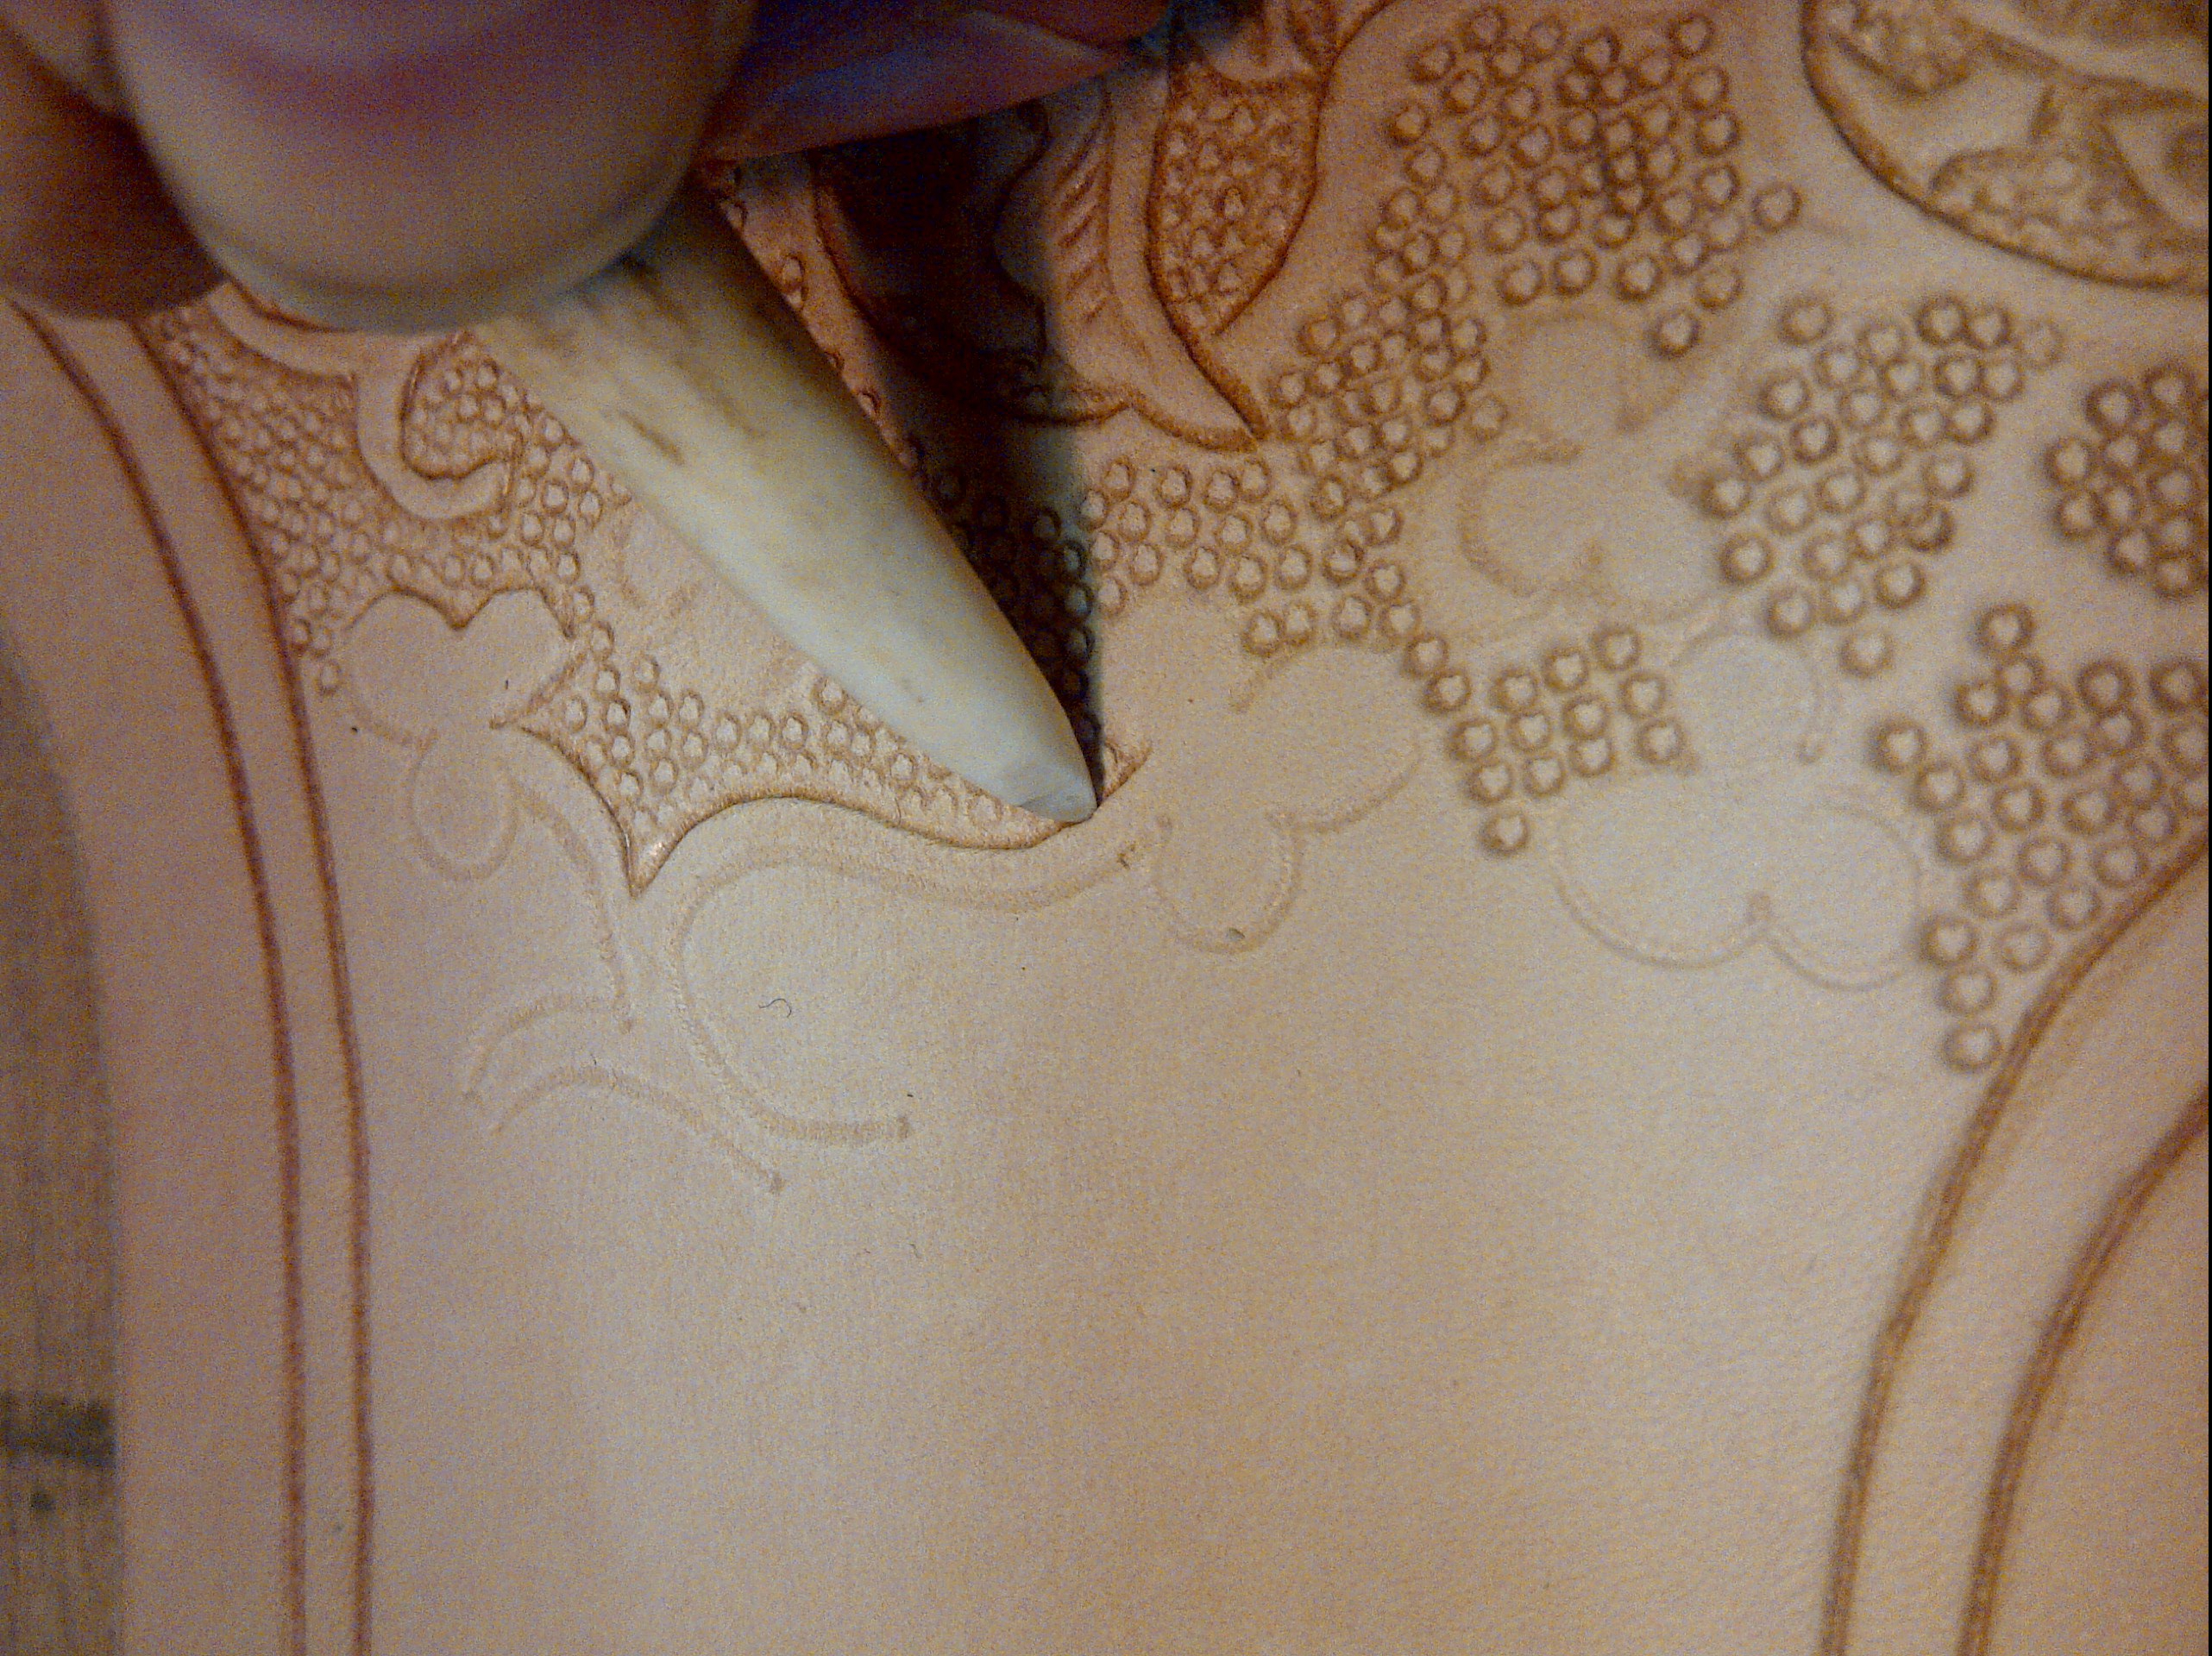
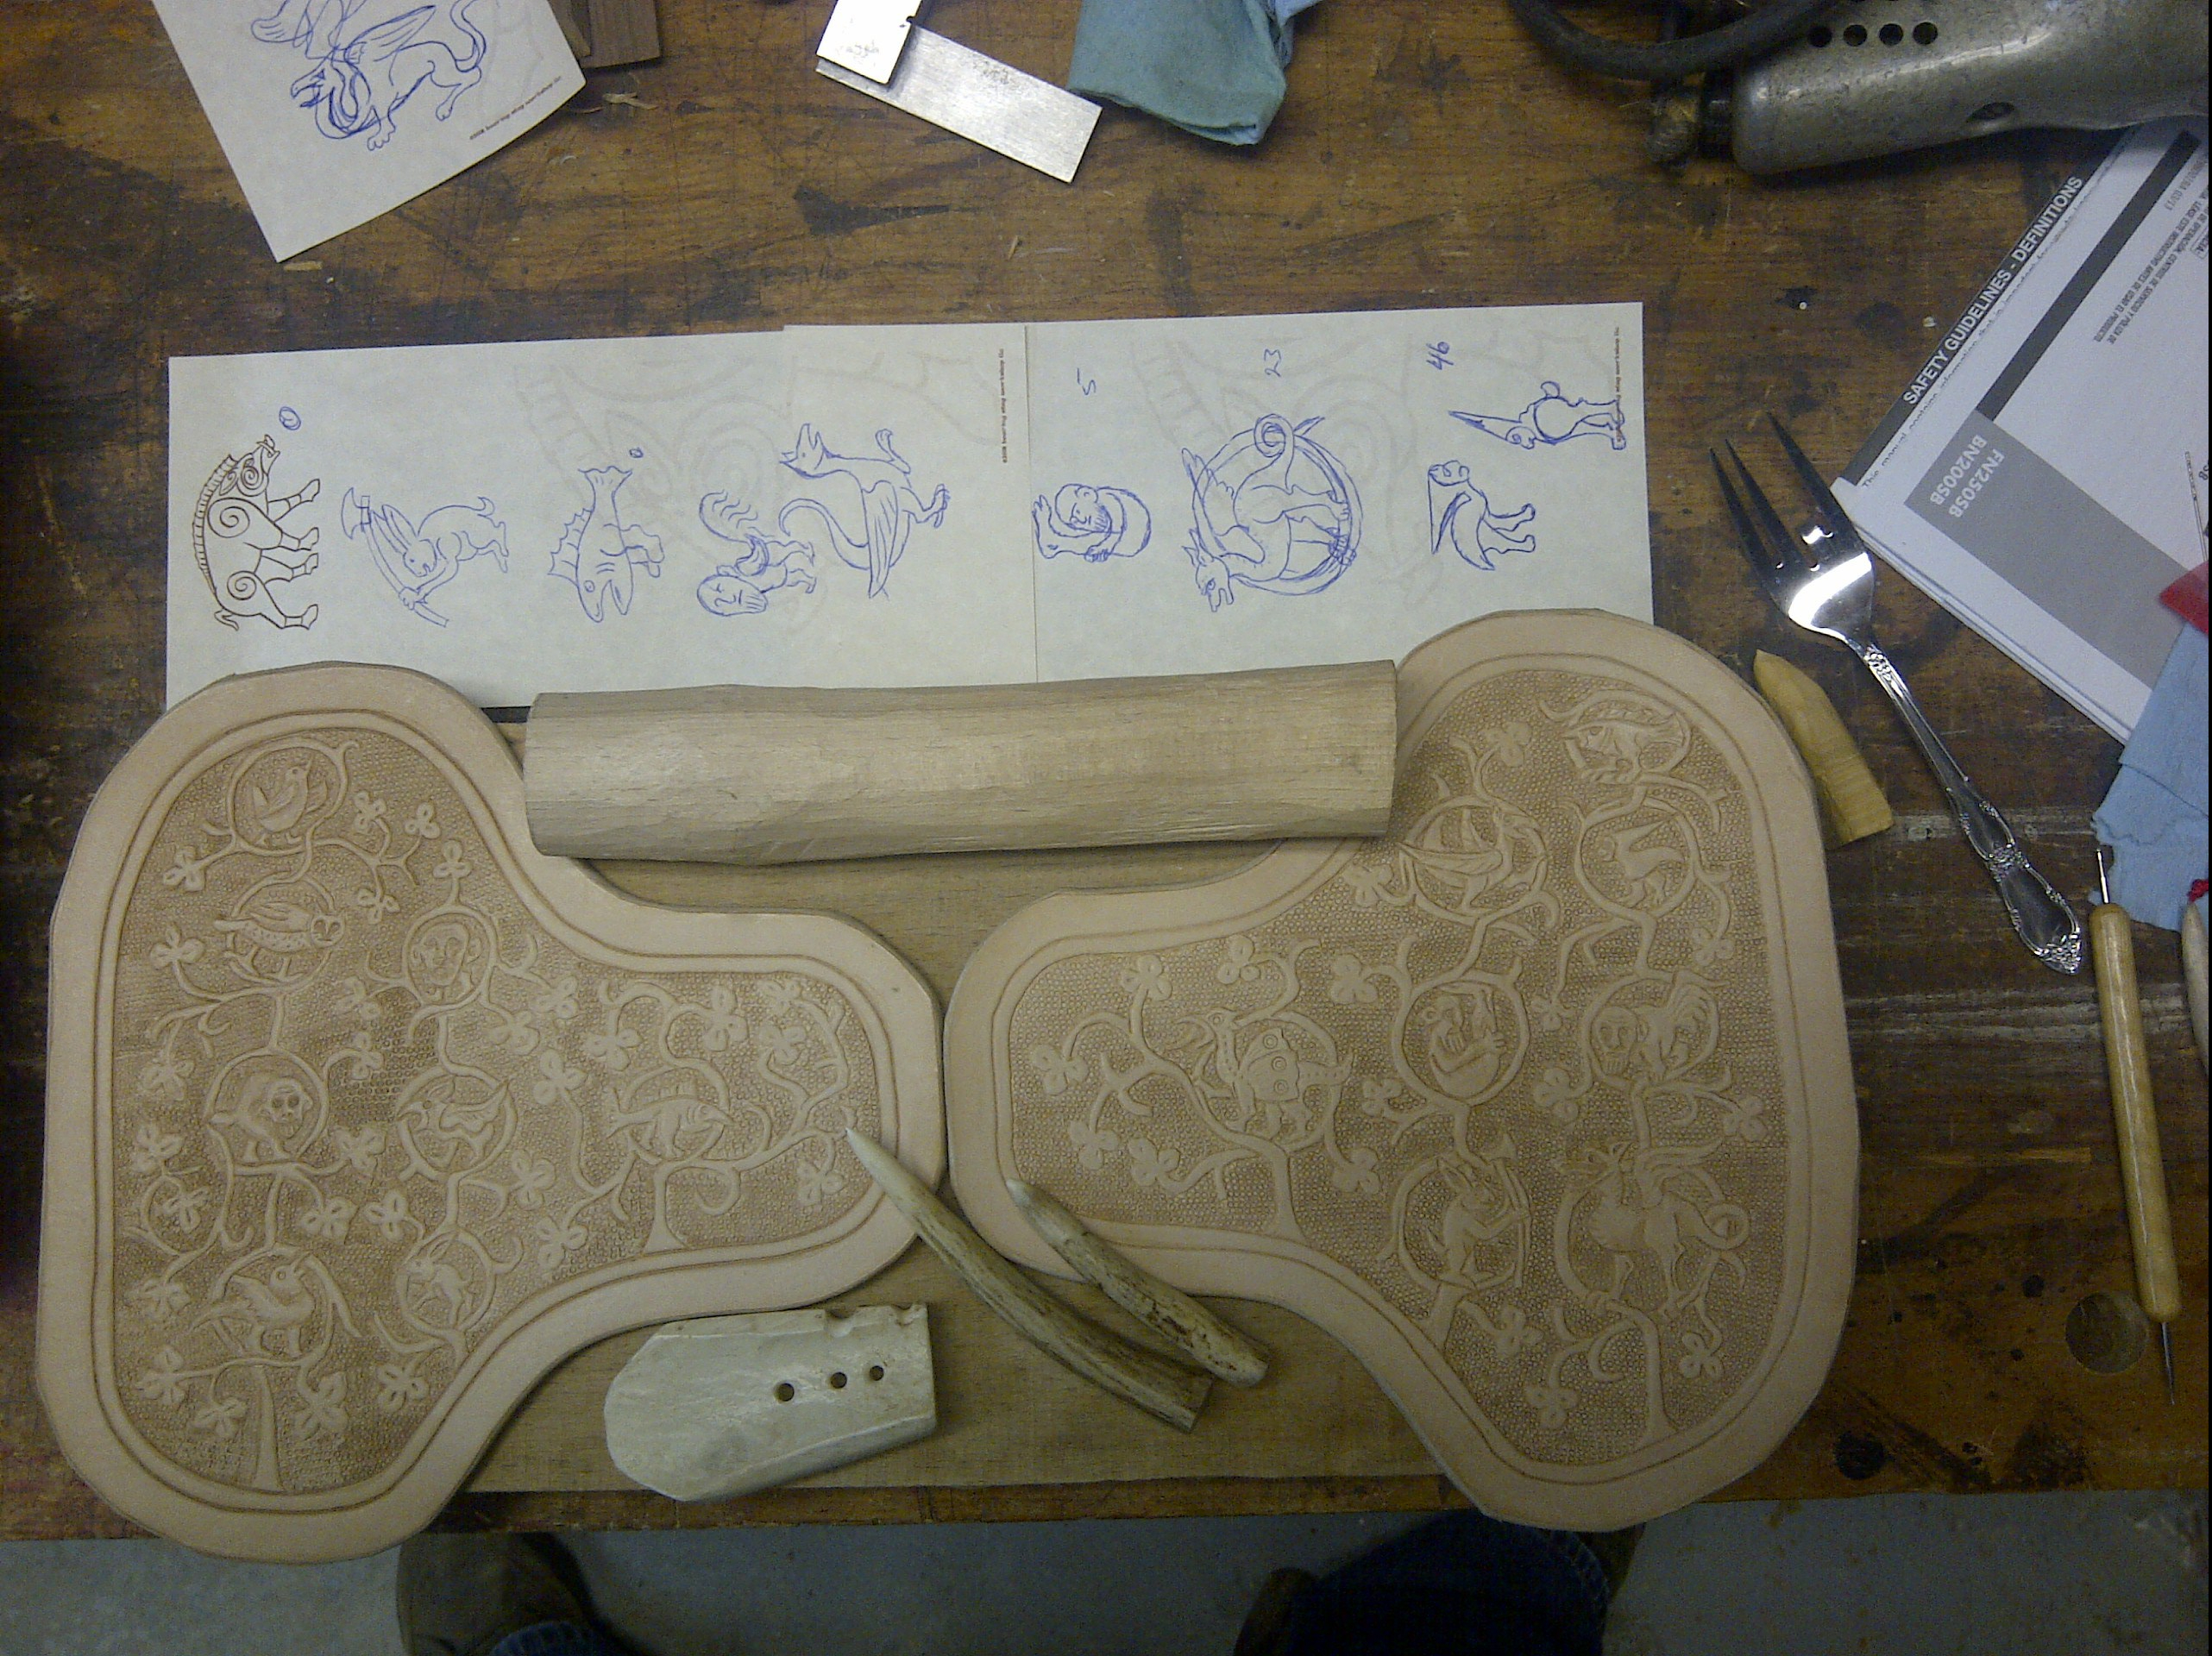
Building on the lessons-learned described above, I began by scaling the extant piece to determine the size of the grotesques and the tools that I would need.  Each creature is approximately 1″ across, and has some degree of sculpting. For these I needed a fine liner and burnisher.  I already had a tool which combined both of these functions in a single tool made from antler.  I used this to finely sketch the pattern, then used it again after doing the grounding to highlight the design details.

img-20150405-00481.jpg

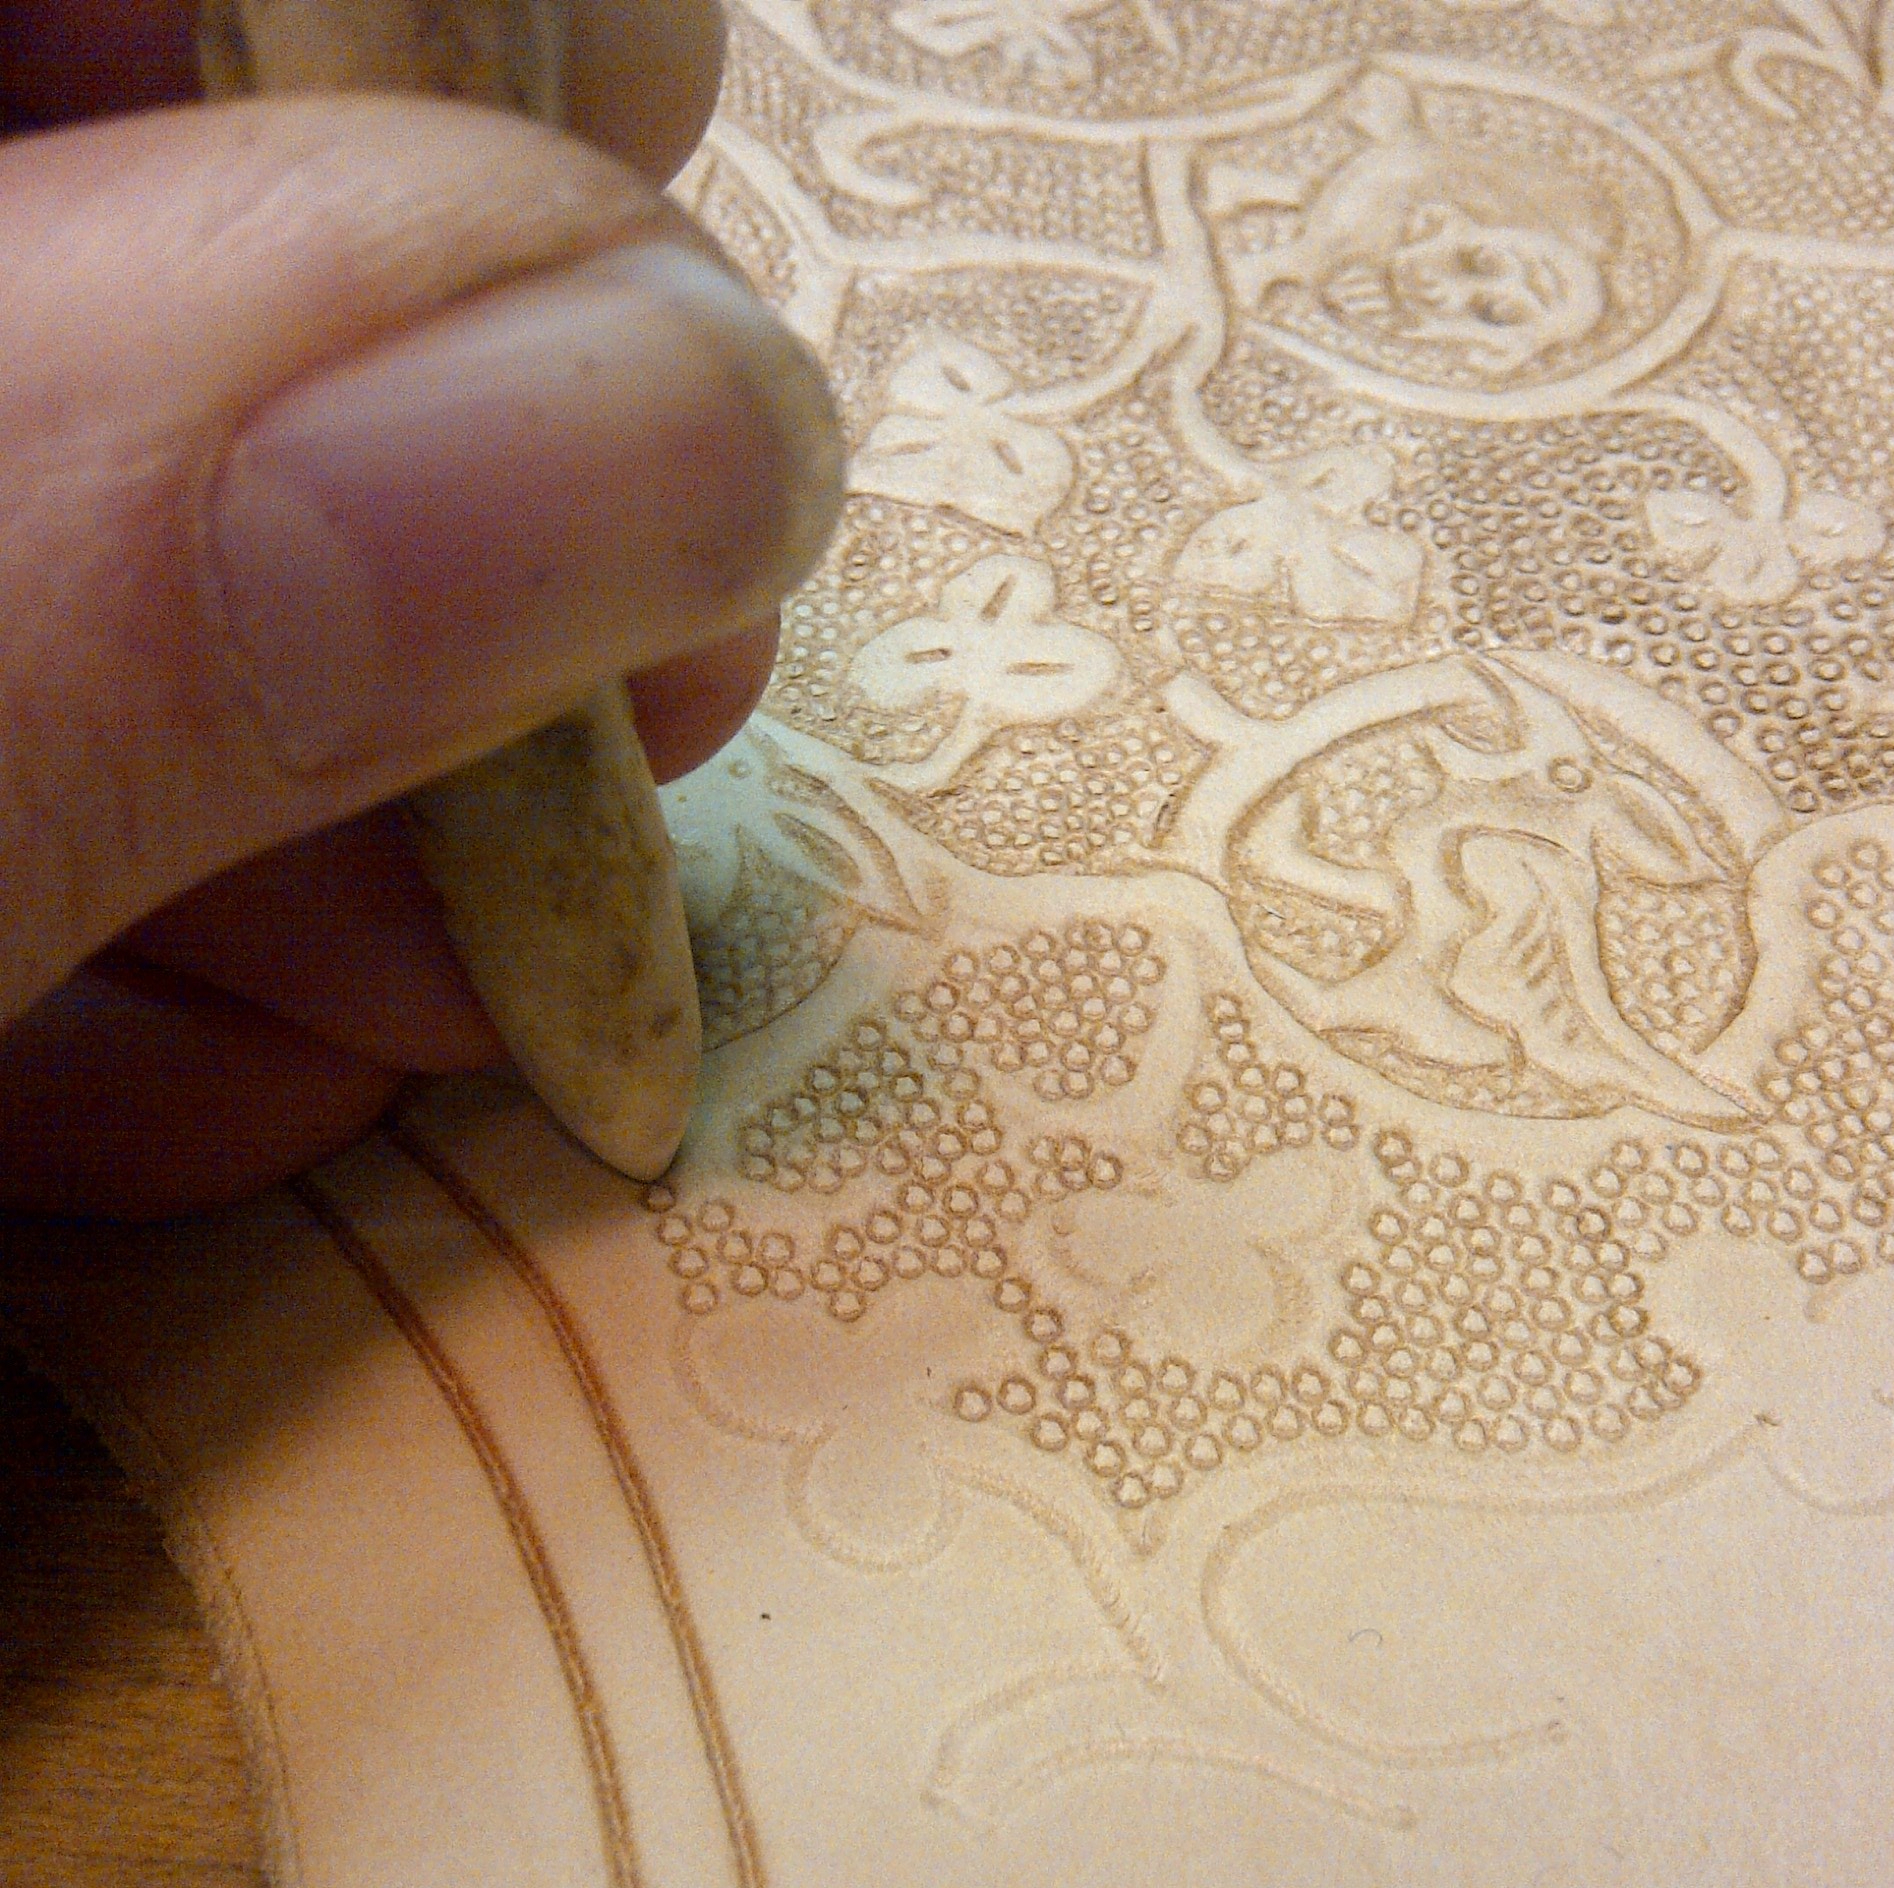
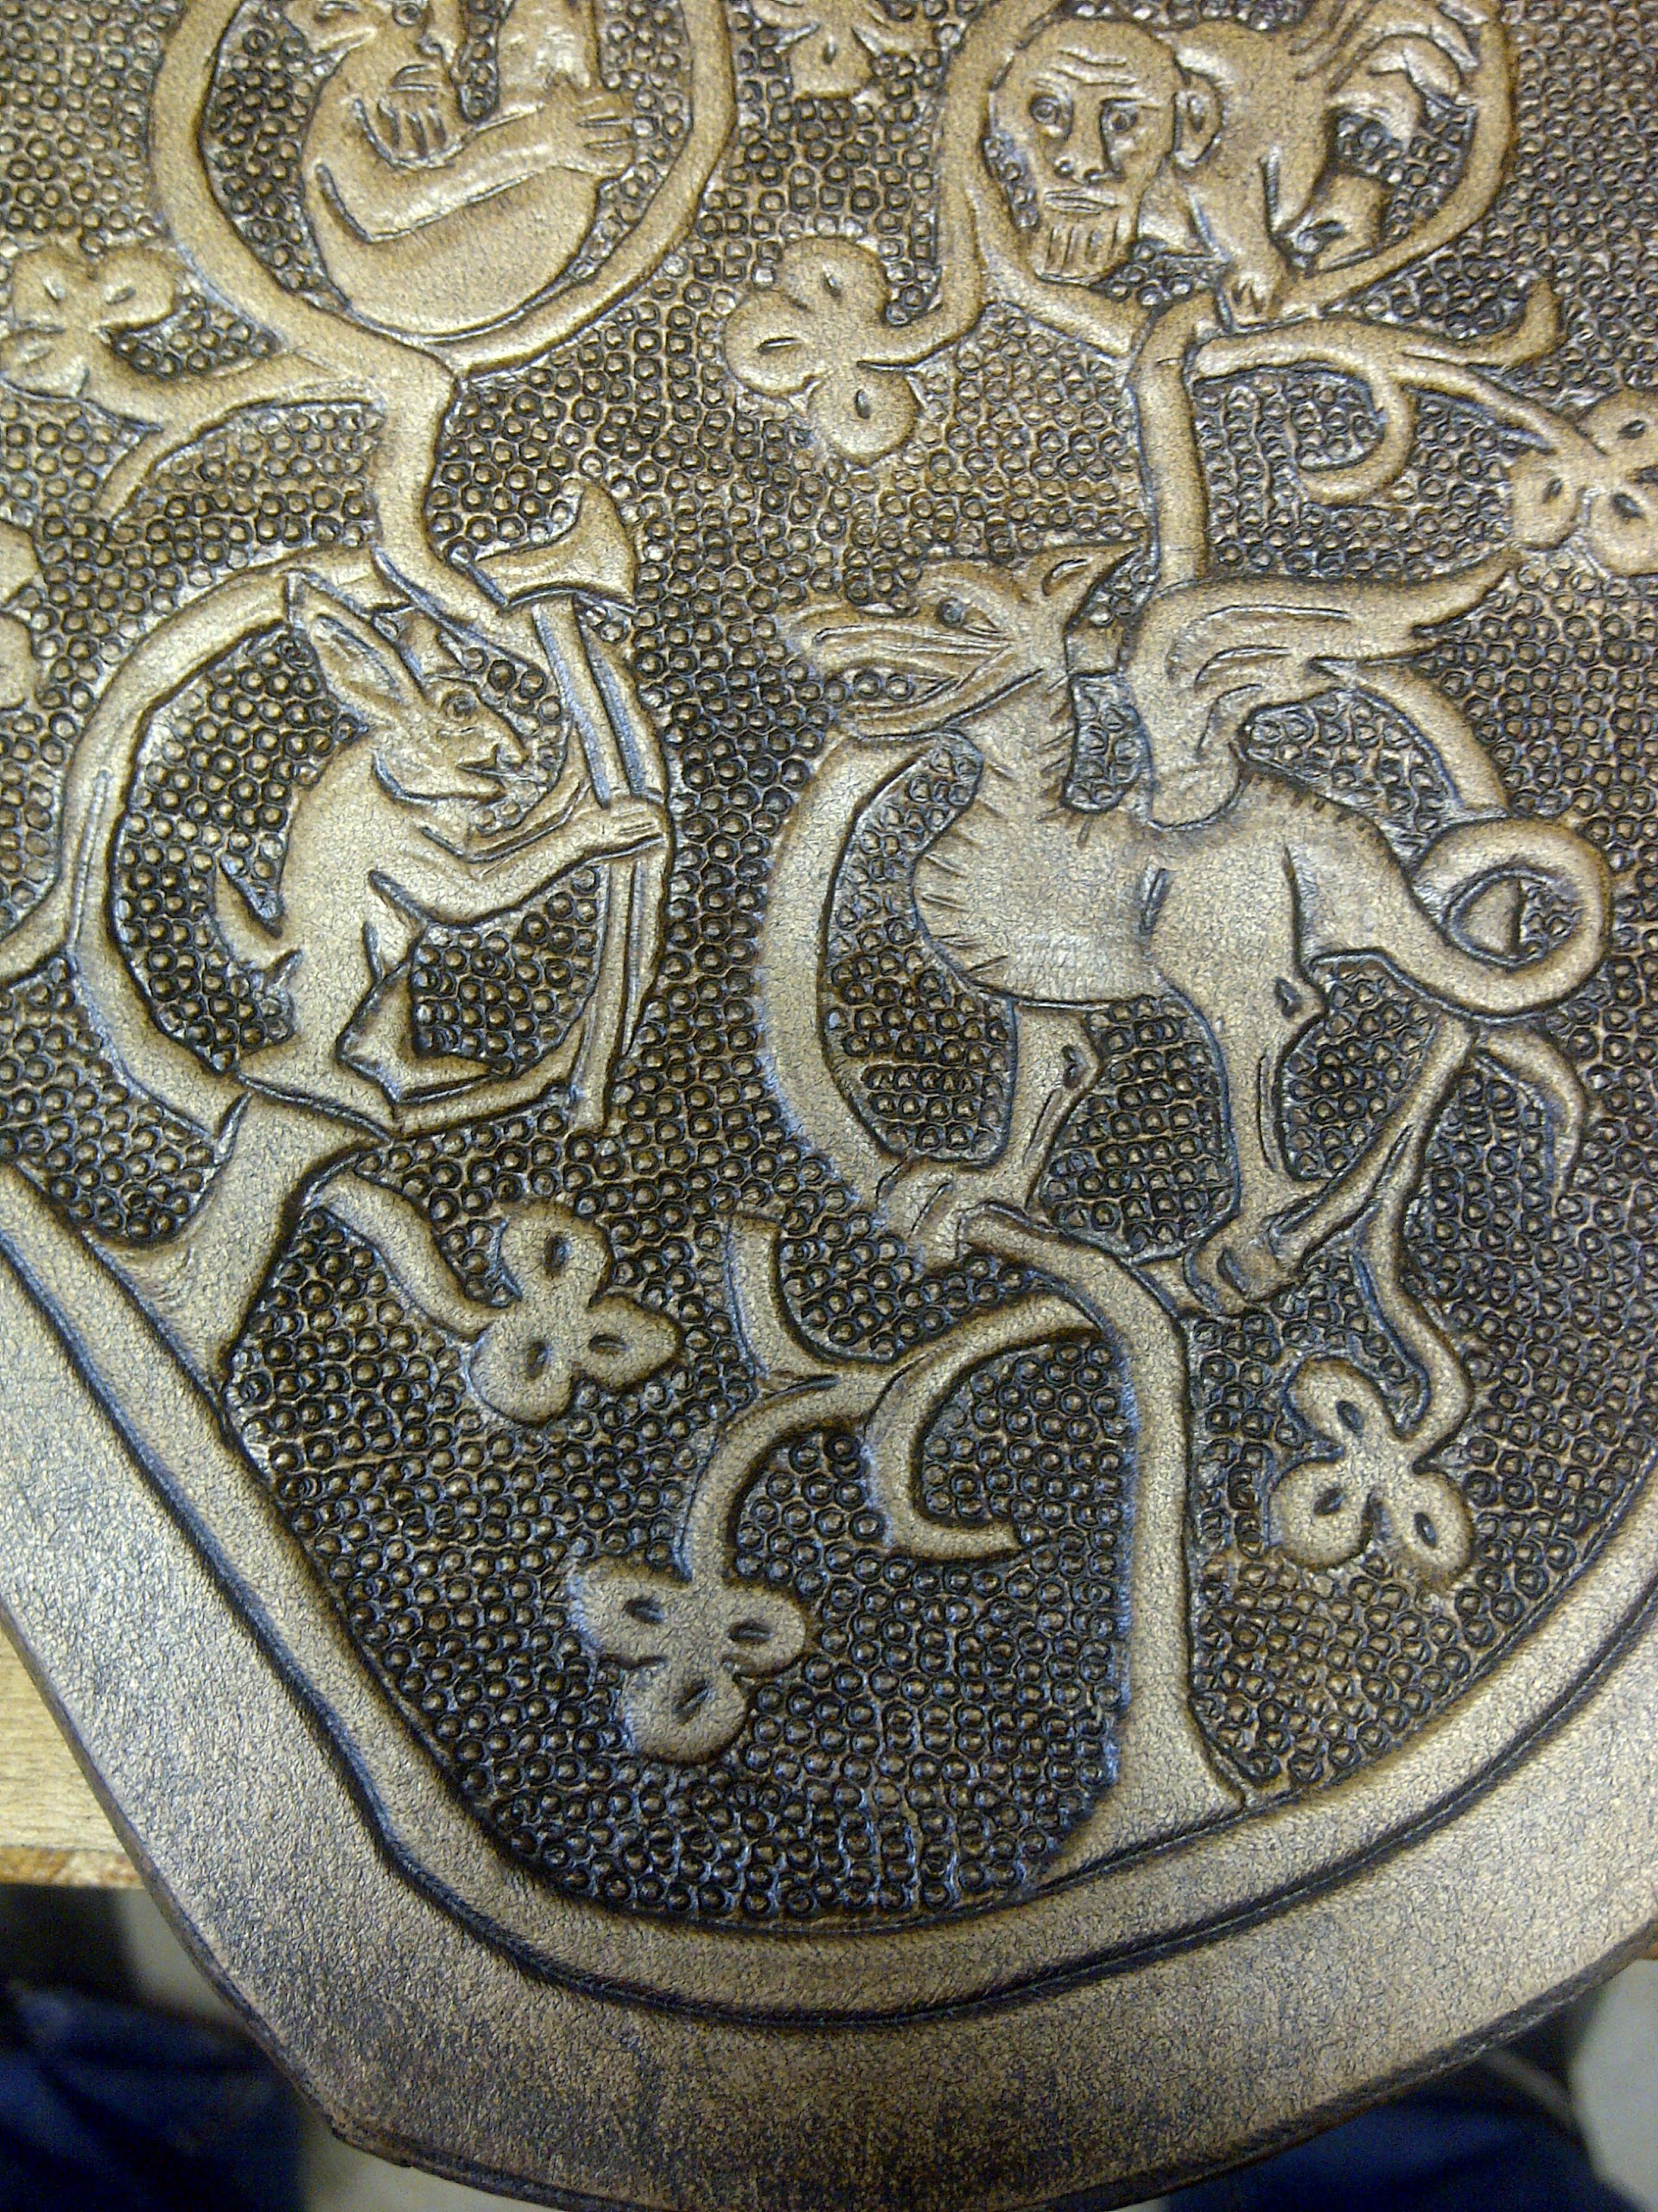
The grounding tool was more problematic.  The ground on the original consists of rows of very fine convex dots at approximately 36 dpi.  I could find no repeatable pattern or indication of a larger stamp.   I made a single-dot stamp from antler and a multi-dot stamp from boxwood with 1/32″ holes but neither left the same impression as the original.  I did notice that the original’s impressions had in places a squarish shape similar to when I have made beaded wire.  I then tried scribing lines 1/16″ apart then going back over the ridges with the single dot punch but the result did not look right either.  As the lines on the original are not straight it seems unlikely that the maker used a straight edge to scribe lines as for this method.  It’s also a more time-consuming method, which would be unlikely for something unimportant like the grounding.  The tool I used to make the beaded wire is square in section, which could leave the straight furrows seen on the piece, however, again, I could not get the same effect when I tried using the beading tool on leather.  My own experiments with the single-dot tool gave results that I was happy with, and if I was careful, I could get reasonably straight lines at 20 dpi.  By working away from me, and from right to left, I managed a fairly consistent pattern although I did tend to curve more than the original as my hand followed the arc of my wrist motion.  It also was a little too big for the fine detail around the creatures.

img-20150405-00479.jpg

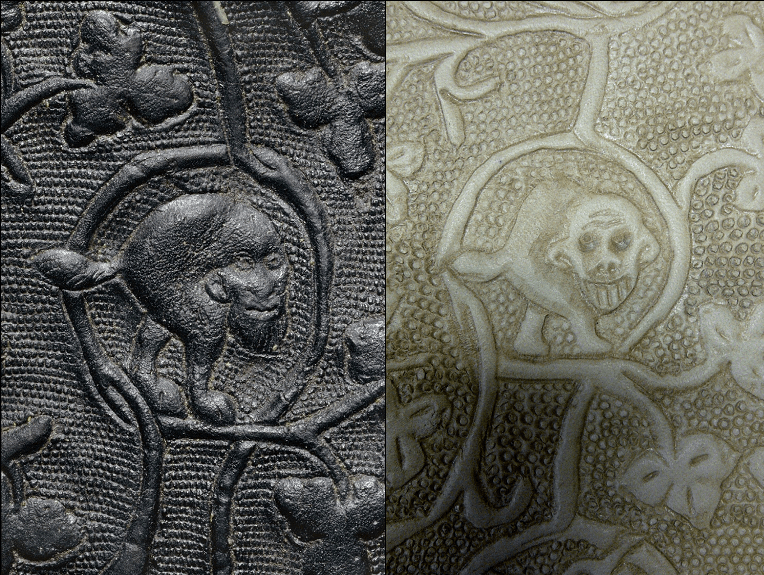
side by side critter

In the photos above, the original (left) and my rendition (right) are compared.  The grounding of the original is considerably finer, and more even, and the detail sculpting is also much finer.   I need both a better tool, and much more practice.

Finally, I burnished the edges with a bone tool I had already made, and cut slots for the straps and holes for the points.

Project Process – Design Elements:

I made the right hand rerebrace first so that I could follow the original’s layout without having to mirror it at the same time.  The base design is vine scrollwork with trefoils, inhabited with grotesque figures.  Each creature is approximately 1″ across. I used the same creatures as on the original for some of the design, similar creatures from illuminations from the same period, and some creatures that I designed myself.  Each creature was sketched in freehand on the leather with a scribe, the vines drafted around it, then the trefoils added to fill in the open areas.  Care was taken with regards the interlace of the vines and overlap of the creature elements (wings, claws, tails etc.).  Unfortunately, I made the griffon on the right rerebrace too big, which threw off the spacing vertically.  Once the layout was sketched in, I filled in the grounding, refreshed the outlines with the liner, then added sculpting and details likes eyes.

img-20150407-00489.jpg

Project Process – Treatment:

My experiments in hardening leather suggested that pre-treating the leather in a saturated solution of alum in distilled water, followed by soaking in a thin hide glue at 150°F was a workable method.  I prepared the alum bath, soaked the leather until saturated, then allowed it to air dry until ready for tooling. I refreshed the leather during tooling with the same water.

The only other change I made from the experimental armour pieces was to dye the leather with black walnut husks soaked in ammonia.  The dye was brushed on,  scrubbed into the grounding, then lightly wiped clear to highlight the raised portions of the design.  The dye was left to air dry for 24 hours.

img-20150408-00493.jpg

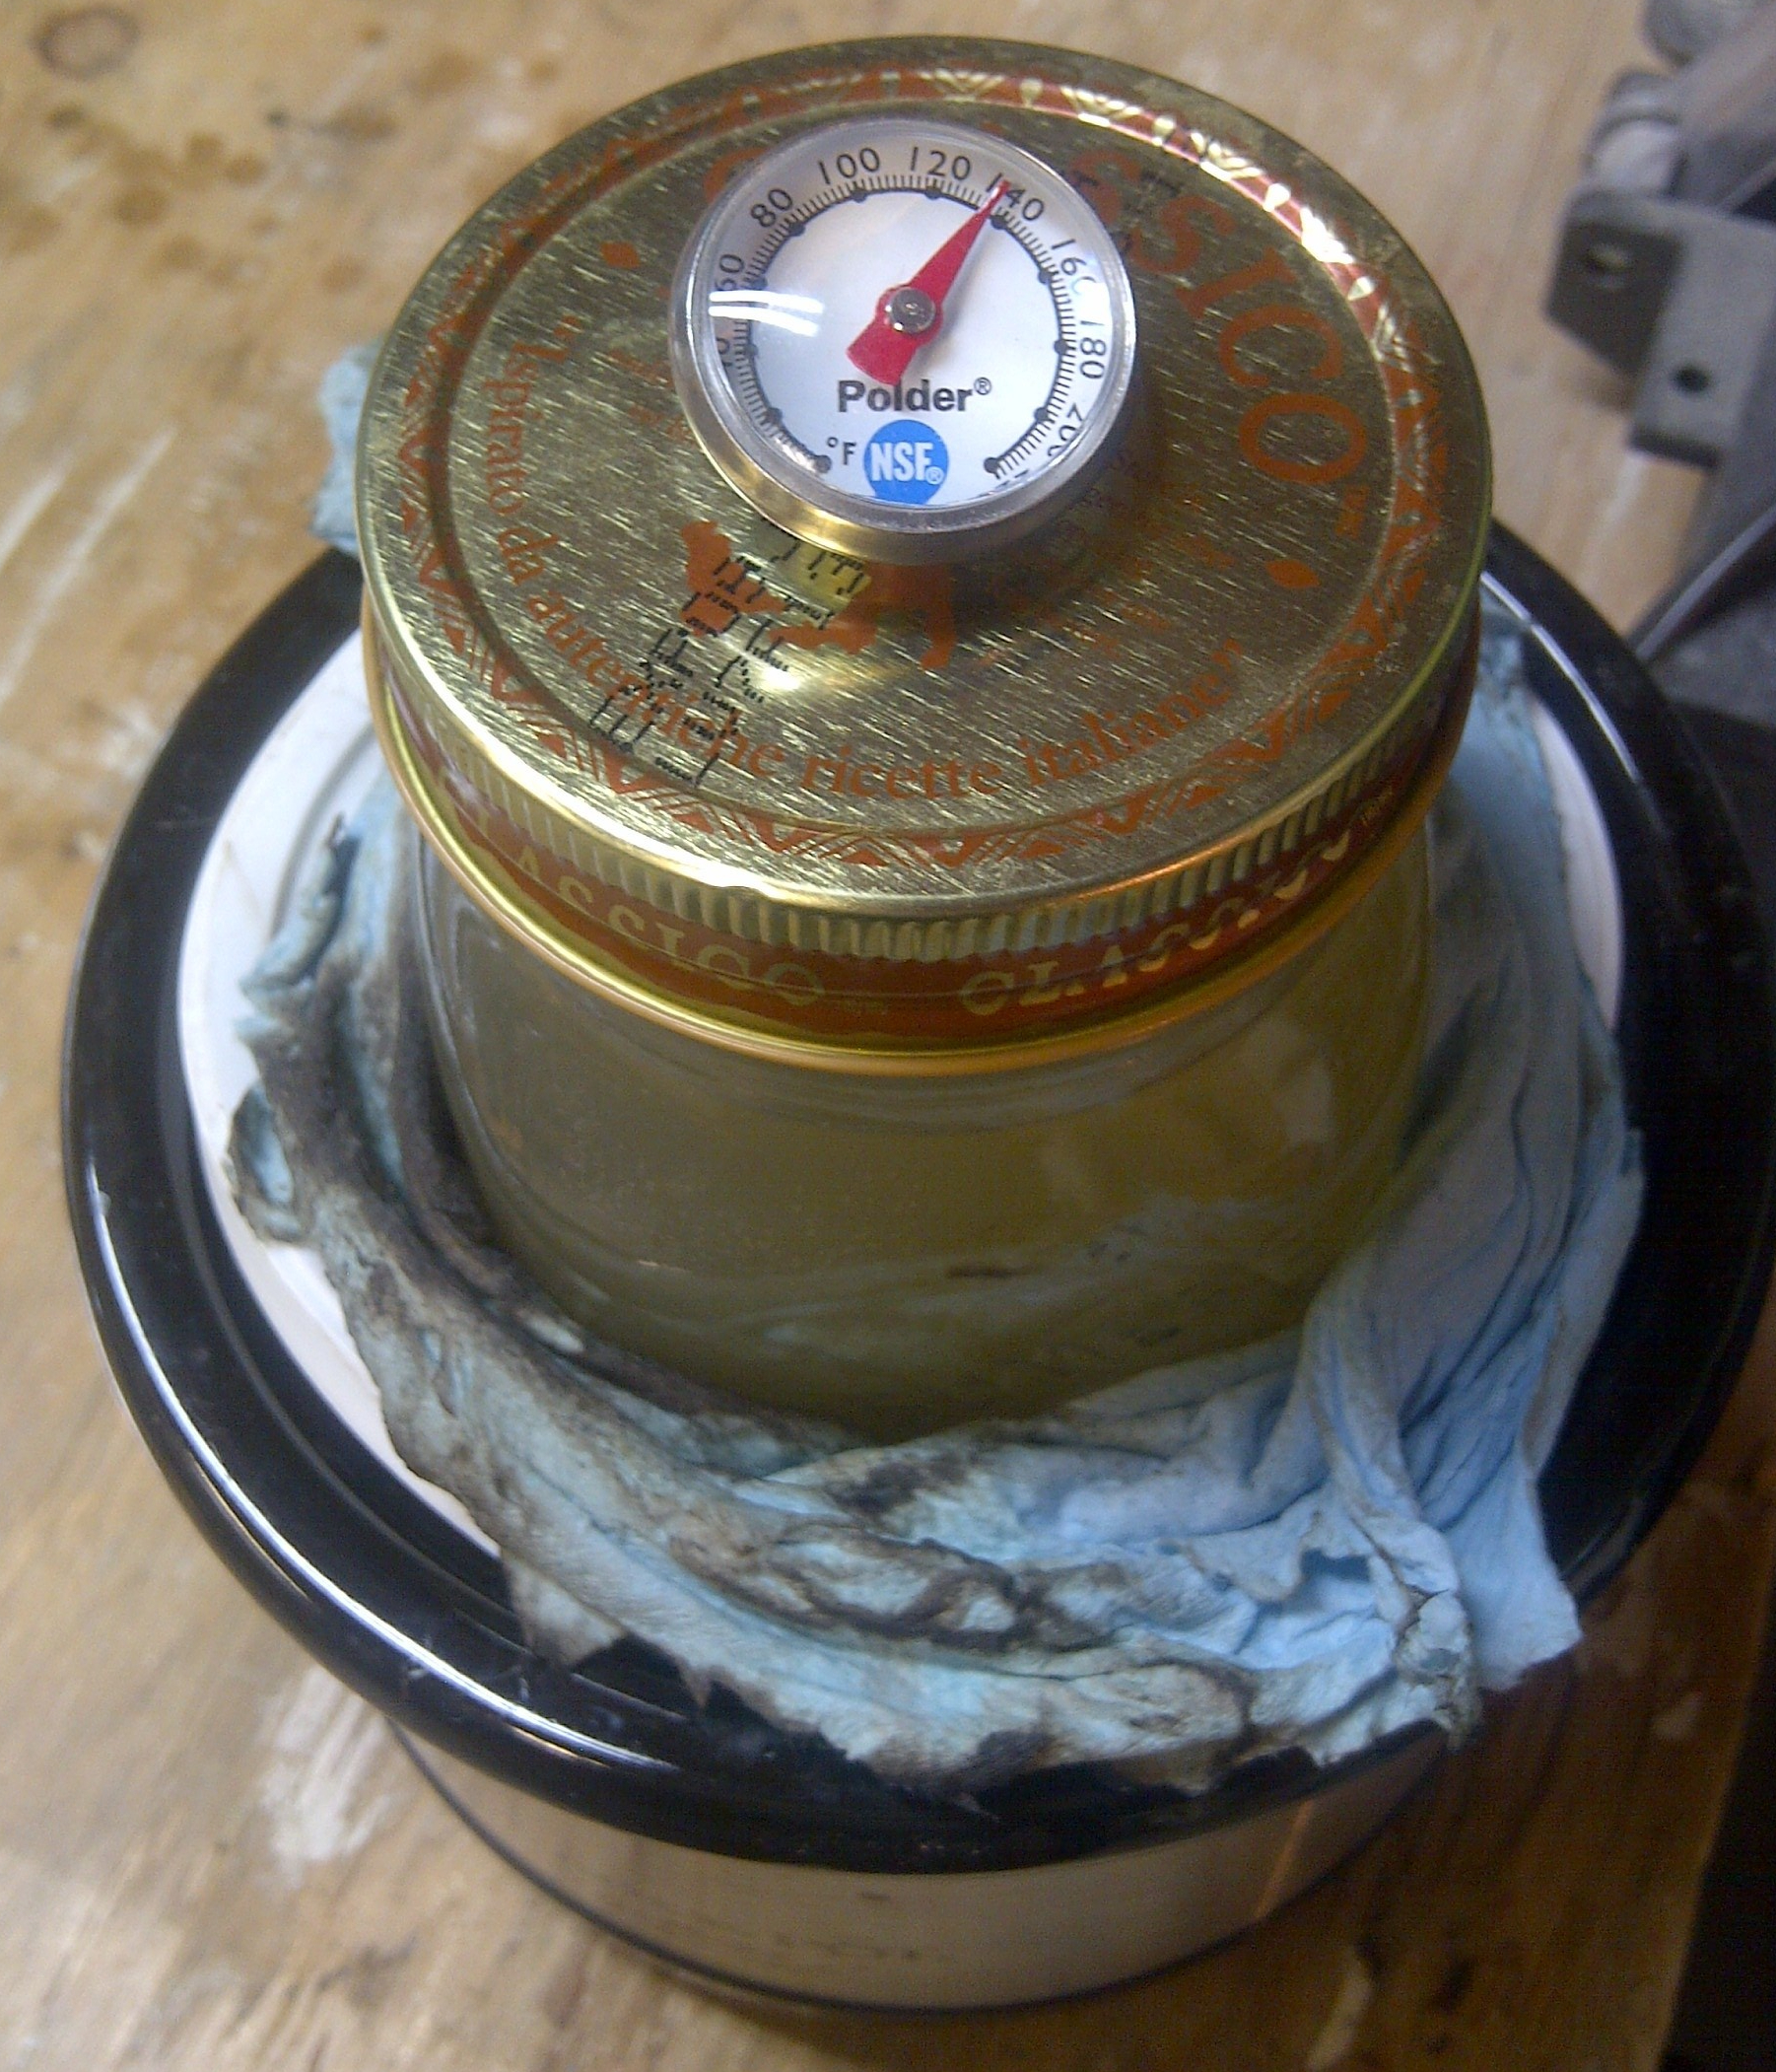
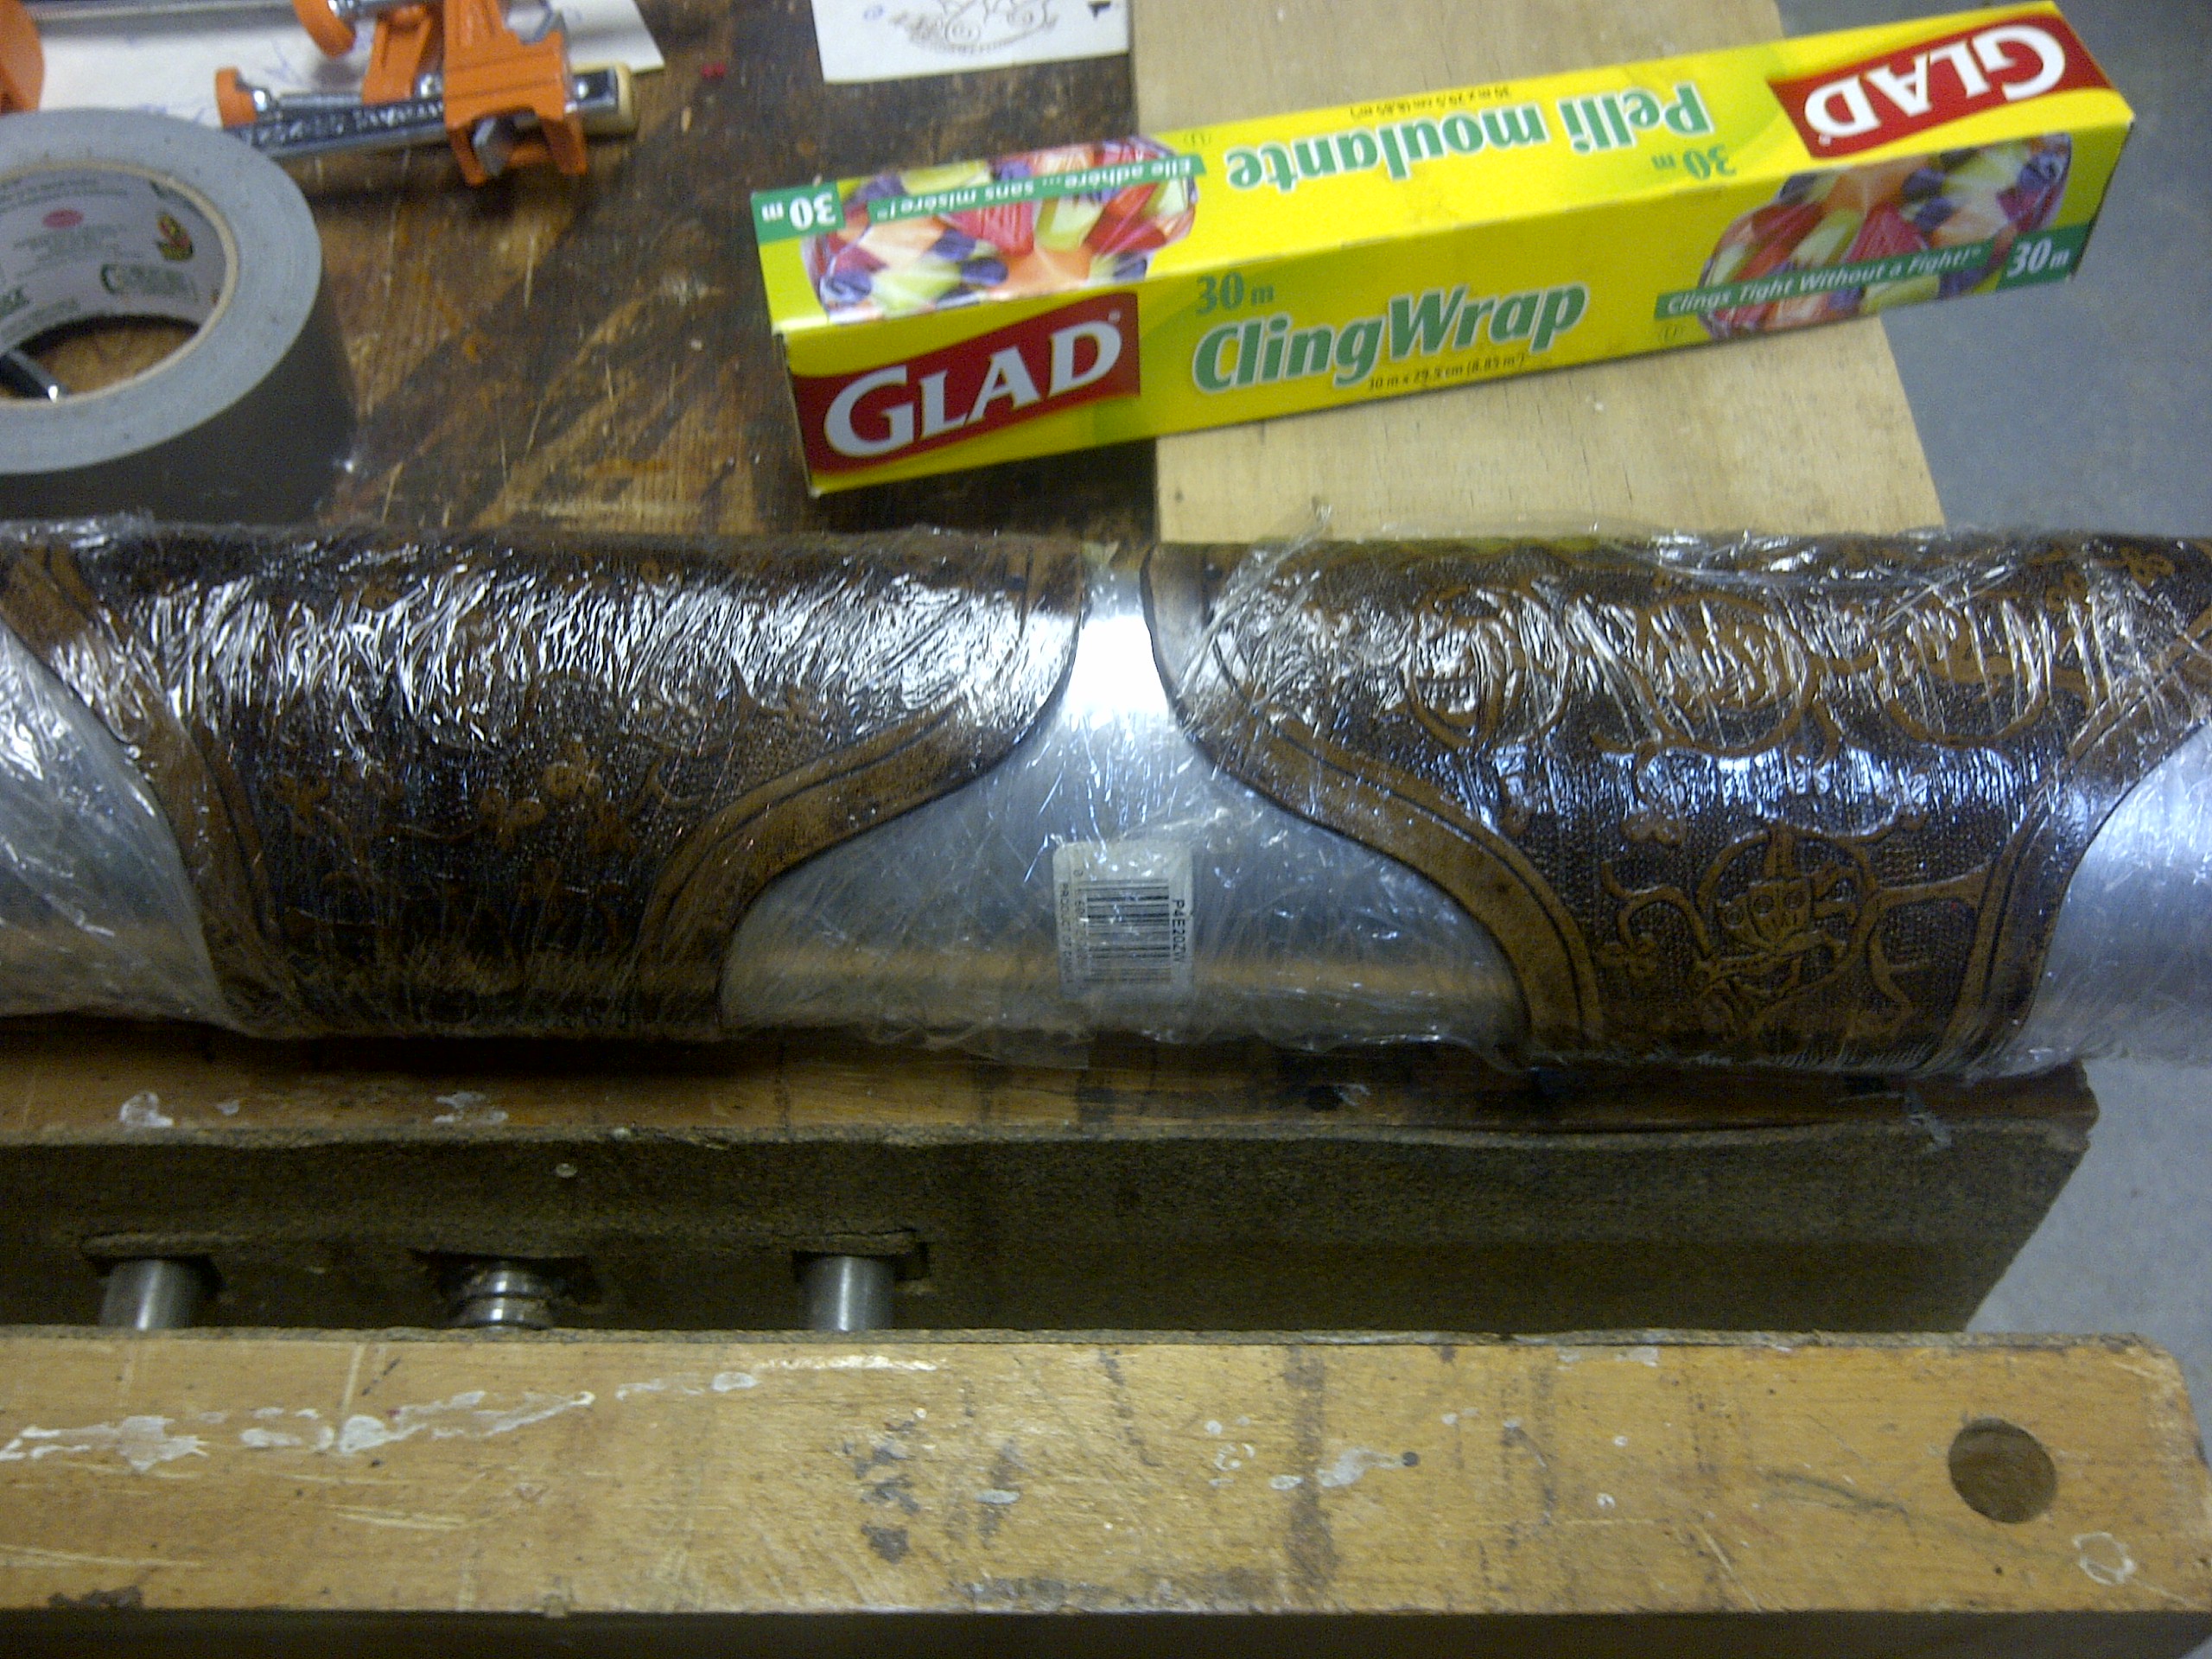
The hide glue was purchased from Lee Valley Tools.  A solution of 10 parts distilled water to 1 part glue granules was created, then left to sit at room temperature for an hour.  It was then heated to 120°F in a small crock pot, when another 10 parts distilled water were added to create a 20:1 solution.  The solution was heated to 150°F, then brushed onto the leather until saturated.  Then leather was formed to shape, wrapped in Saranwrap to hold it in place, and left to cool for about 10 minutes.  When I made the test armour, with a thicker glue, I needed to wipe down the pieces with alum solution not only as a post-treatment but to remove excess glue which lay quite thick on the leather surface. I repeated the same process but, due to the thinner glue soaking into the leather quite well, there was little excess glue to remove.

img-20150408-00494.jpg

IMG-20150408-00496

After air drying for 24 hours, I added straps and buckles purchased at Pennsic from Thor Thor.  The joins were stitched with modern polyester thread rather than use even more modern rivets.   In use, they will be pointed to my gambeson.

The end result was an armour with some flexibility, but, I feel, good protective properties as well.  I will use them in regular combat to find how well they stand up to every-day wear and tear although based on my experiences with the test pieces I am confident they will perform well.

Lessons Learned:

  • While the dot tool worked well for the large open areas, it was too big for the fine detail around the grotesques. Further experimentation needs to be done to develop a finer tool and to try different processes to recreate the grounding pattern on the original piece.
  • The glue cools too quickly to get full penetration of the leather. I didn’t want to get too thin a mixture for fear that it would ruin the tooling, although the thicker solution used earlier did not penetrate well. Again, this needs more experimentation.

References:

  • British Museum, item # 1865,0701.1665
  • Covington, Anthony D.; “Tanning Chemistry: The Science of Leather”, Google Books version
  • blogspot.ca; episode #90, discussion of hide glue in woodworking
  • Cennino Cennini, “The Craftsman’s Handbook – volume 2”; translated by Daniel V Thompson Jr., Dover, 1960.

How I Make My Shields

I was asked a few times recently how I make my shields for SCA combat.  I had already been thinking of this, and had taken a number of photos while doing my most recent shield, so here we go…

First, and most important, is preparing the blank.  I’m using an aluminum blank, not wood, and since this is a re-covering job all the holes are already in place.  I strongly recommend making the holes for handle, strap, and edging first so that if you put a hole in the wrong place you can cover it later with the canvas.  When I made my first heater, I made a wooden blank the same size as the aluminium one and used it to figure out where I wanted the strap and handle.  Once I was happy, I transferred the pattern to the aluminum one.

What do I need?

  • shield blank
  • heavy duty garage door handle
  • piece of 1″ wooden dowel, or old broom handle, 4-5″ long
  • hockey tape
  • 1/4″ mild steel bolts with washers and lock nuts, two for the strap and enough for your door handle (2 or 4)
  • 1/8″ and 1/4″ drill bits and a power drill
  • sharpie marker and a pencil
  • piece of canvas slightly larger than your shield
  • contact cement and disposable brush
  • rubbing alcohol and paper towels
  • artist’s gesso or white acrylic paint, plus whatever your heraldic colours are
  • 8 oz leather, 4″ wide and long enough to go around the shield
  • 2-3 spring clamps
  • fake sinew or heavy twine and heavy needles
  • heavy duty harness needles
  • awl

Where does the handle go?

On a round shield that is easy, draw a line along the centreline of the shield, mark where your hand goes, put on the handle, mark where your elbow is, go 2-3″ closer to your hand, add the strap.

A heater style is a little trickier as the angle of your arm and the angle of the shield don’t necessarily match. While in my base guard position, I want my arm in a position that I find comfortable while the shield is in a good defensive position.  As a start, I marked a spot 6″ down and in from the front top corner of the shield.  This is approximately where the centre of my hand will be.  I use heavy garage door handles as my shield handles, I fit a chunk of dowel or old broom handle into the groove and wrap it with hockey tape.  Now, with my hand centred on the spot, and with the handle in hand, I mark the bottom bolt hole, drill and put in a bolt just tight enough to not slop around.  Here is the slightly tricky bit – hold the shield up in the position where you want your arm to be and then adjust the blank until the shield is where you want it to be.  This will be your final hand position.  Now mark where your elbow is.  Remember that your grip angle is not necessarily at 90 degrees to your arm, so if the handle seems to be a little cock-eyed, that’s ok.  I like to put my elbow strap 2-3″ from my elbow so it doesn’t jam on my elbow cop or vanbrace.  Finally, I mark out the holes for the hockey face mask I use as a hand guard.

Leather edging?

I like leather edging on my shields, it protects the edge, catches thrusts, and makes a soft thump noise when it hits my head helping me to distinguish shield from sword.  I use chrome tanned leather for this so I don’t have to worry about it getting wet, and I like to put a strip of car-door edging under the leather on the forward top and edge where it takes the most abuse.  Using the sharpie, mark a line 1″ in from the edge of the shield all the way around.  Now mark the holes about every 1″ along that line, making sure that holes are in each of the corners and the bottom point where you have to make the leather turn the corner.  Drill each hole with the 1/8″ drill.  Yes, it’s a lot of holes.  I also go back and touch up each side of each hole with the 1/4″ drill to get rid of any rough edges and burrs.  Rub a finger over the hole, if it catches, you have a burr which can cut the thread.

Canvas cover for an aluminum shield:

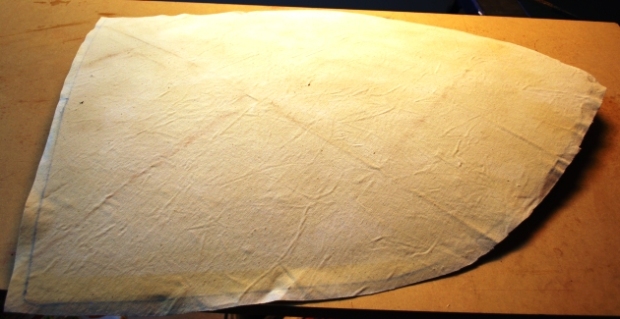
Covering an aluminum shield blank with canvas is time consuming, but looks awesome when it’s done.  The covers on mine have lasted for years and small repairs are easy to do with a little 5 minute epoxy.  As I mentioned at the beginning of this post, preparation is the key.  Wash the canvas 2-3 times to remove any sizing and loose fluff.  Wash the aluminum with the rubbing alcohol to remove any grease and dirt – I keep wiping it down until the paper towels are no longer black.  Lay the blank on the canvas and pencil the outline on the canvas.  Lay the blank face up beside the canvas.  Brush a layer of contact cement on the canvas, go about 2″ past the outline.  Now brush the contact cement on the shield.  By the time you’ve finished the coat on the shield, the canvas should be ready for a second coat (the cement will soak into the fabric).  Brush a second coat on the fabric and let both cure according to the directions on the can.

canvas and shield all glued up:

Image

If you have never worked with contact cement, be prepared, when it sticks it does not want to let go.  It is important to make sure that when you place the shield on the canvas it is in the right spot.  Since my shield is curved, I aligned the top and the point with the canvas and slowly lowered the shield onto the canvas.  Once I was sure I was in the right spot, I slowly rolled it left, then right, to contact all of the canvas.  I then turned it all over, face up, and smoothed the wrinkles out, working from the centre of the shield towards the edges:

Image

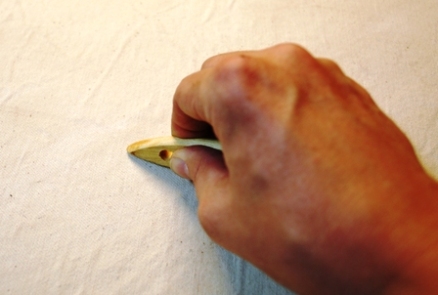
Now, you’ll notice that there are still lots of small wrinkles.  Here is a cool trick that Duke Edouard taught me; take the handle of an old paintbrush or toothbrush, anything smooth, and working from the centre out, rub the canvas hard.  You’ll see the canvas get a little shiny as you work:

Image

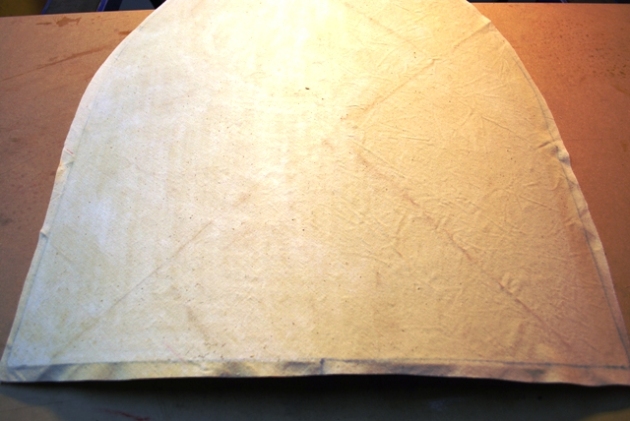
This will get rid of the little wrinkles and make sure there is a good tight bond between the cement and the canvas.  The cement will work up into the fabric of the canvas, binding together the threads and reducing the chances of it tearing when in use.  Again, it is time consuming but it makes a big difference in the durability of the cover.  In this photo, the left side has been rubbed out, the right is still loose:

Image

Finally, brush a little contact cement on the back of the shield and roll the canvas over the edge.  Trim the fabric so it is just short of the edging holes so that it is covered by the leather edging when it’s all done.

Painting:

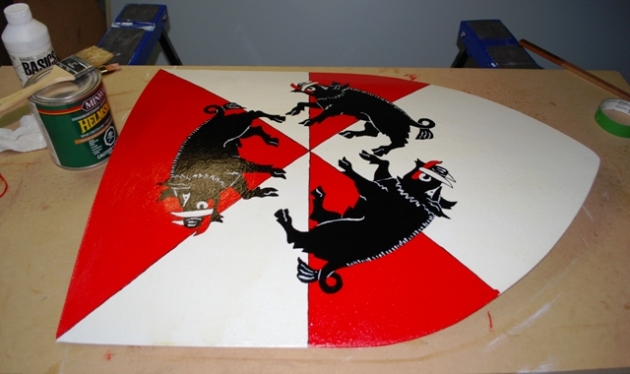
I like to use acrylic paint;  it’s easy to clean up, is waterproof, dries quickly, and is flexible enough to take a beating.  Artist’s gesso is really just white paint that has been designed to prepare canvas for painting.  (true gesso is made from rabbit skin glue and is very expensive, you don’t need this)  I had it so I used it.  I put down two or three layers, until the canvas is smooth enough for painting my heraldry.  I layout any straight lines, my gyronny field for example, using painter’s tape.  I outline everything with black to give it a little pop.  When it’s all done, I like to use a coat of marine (spar) varnish to protect the paint. It gives a yellow tinge, which I like.

Image

The final step is to punch through the canvas over all the holes.  I use an old ice pick.

Edging:

Unfortunately, I don’t have any photos of my edging techniques so I’ll try to describe it here.  First, I soak the leather in water. Chrome tanned leather needs to be soaked longer than veg tanned.  I’ll leave it for a few hours, then hang it up for another hour or so that it’s not dripping wet when I’m working with it.  I line up the face side of the leather so that the holes are about 1/2″ in from the edge.  The front corner takes the biggest beating so I like to have some car door edging under the leather for added protection.  I start in the middle of the top edge and work clockwise around the shield.  If the leather edging is long enough, I go from the middle of the top to the bottom point in one piece.  Why?  Because this piece will need to be replaced at some point and it’ll be easier if it is all one piece.

Using the awl, poke a hole in the leather about 1/2″ in from the edge, line up the leather with the hole in the shield and wrap the leather around the shield, clamping it in place.  With the awl, find the opposite side of the edging and punch a hole.  Thread the sinew through all three holes (edge, shield, edge) and repeat for the next hole.  I use a harness stitch for this.  (I really should have some pictures for this, or maybe a video…)  Take your time, make sure the outside lines up with the the shield holes as this is the pretty side, you can trim off the excess on the inside later.  At the corners, I cut the leather at an angle just on the outside and inside faces, leave the edge intact, and overlap the leather at the corner.

Notes:

Arm straps;  never use commercial belts.  They are often made from light leather, or fake leather, over a cardboard stiffener.  Also, the buckles are cheap white metal castings which break at exactly the wrong time.  I use leather from the scrap bin at my local Tandy outlet.  I get my buckles from a saddle shop.

Bolts;  I use 3/16″ or 1/4″ mild steel bolts with lock washers and/or lock nuts.  Lock nuts have a nylon insert to help stop the nut from loosening over time.  They shouldn’t be reused as the nylon “sets” itself on the first use.  Make sure to use a large washer over leather to stop the nut from pulling through the leather.  You do not need bigger bolts than 1/4″, you are just adding weight for no reason;  the bolts are already stronger than anything else on your shield.  I also don’t use stainless steel bolts – the first time you try to remove a seized stainless bolt you will understand why.  If you are using a wooden blank, don’t use screws, they will pull out.

Sewing;  I use a harness stitch, which uses two needles threading back and forth.  Sometimes the needle, especially the second needle, is hard to pull through.  I’ll take a pair of pliers, wrap the jaws with hockey tape to protect the needle, and use them to pull them through.  The needles I use for shields are very beaten up!  To measure the thread length, I take the length of the seam and triple it.  To end a stitch line, I backtrack one needle one hole and tie it off on the inside of the shield.

Why do I wear an elbow cop and vanbrace behind my shield?  Simple, when I have to drop my shield to switch to off-hand, like I might need to do in Crown Tourney, I want the armour already in place.  I also don’t want to only wear them for Crown as I don’t want anything feeling “weird” on the day.

The Infinite Women Project

When I was a child, I remember my father commenting that there was no record of medieval women because “they” didn’t write down their names.  I assumed at the time that “they” were the medieval writers.  It was many years before I realized that “they” were the modern scholars who cut women out of their writings and genealogical tables.  It annoys me that this (mostly Victorian) myth that women were not important is still common.  I don’t consider myself a feminist, what I do have is a strong sense of justice and blindly cutting half the population out of history is an injustice.
Many years ago, I began making notes about interesting women who did things that did not fit the stereotype.  Several years ago, I began putting those notes into electronic format, with source material and cross-references (mother to daughter for example).  Then my OCD kicked in.  Now, whenever I read about any medieval woman, she goes into the database.  Admittedly, it makes reading tedious as it can take all evening to get through two pages of a book, and there were a few moments where I said to myself “oh god, not a genealogical table! well, there is my evening shot!”  I even went through the entire Chambers Biographical Dictionary over the course of about a month.  But, I now have a fairly extensive database (662 entrants as of today), from Ada, a Lady of Charlemagne’s court, to Zoe, Empress of Byzantium.  I have restricted my endeavors to the medieval period in Europe, although I have added some particularly interesting women from outside of that area.
I started this in a program called OneNote as it allowed me to just dump information similar to a binder of paper notes.  Now that this has taken a life of it’s own, I may want to switch to a proper database program.  For now, what I have is a page of source material, then a listing of each woman with time period, title, parents, husband(s), and children.  This is hyperlinked to another page with the detailed information, also hyperlinked to related detail pages.  The biographies may be quite brief, as the lady may only be mentioned in a will or court document, or quite extensive for more well-known people.  Here is a random example:

Walburga

Ref 2, page 1523
Also: Walpurgis, Walpurga
Saint, feast day 25 February
Sister of Saint Willibald
Born: c.710
Died: c.779

Born in Wessex, she accompanied Saint Boniface on his mission to Germany.  She became abbess of Heidenheim, where she remained until she died.  In c.870 her relics were transferred to Eichstatt.  Walpurgis Night, 30 April, arose from a confusion between the day of that transferral (night of 1 May) and the traditional superstition regarding the flight of witches on that night.

  I have had a lot of problems with alternate spellings of names, so I’ve added a block for AKAs.  I have also found problems with some of the source material where they themselves are confused about, for example, who was first wife of King Soandso and who was his second wife.  Where I have found issues with the source book, I have noted it in the biography and in my list of references.
Overall, I find this project both fascinating and tedious. I will keep plugging away at it, because that is the sort of person I am.